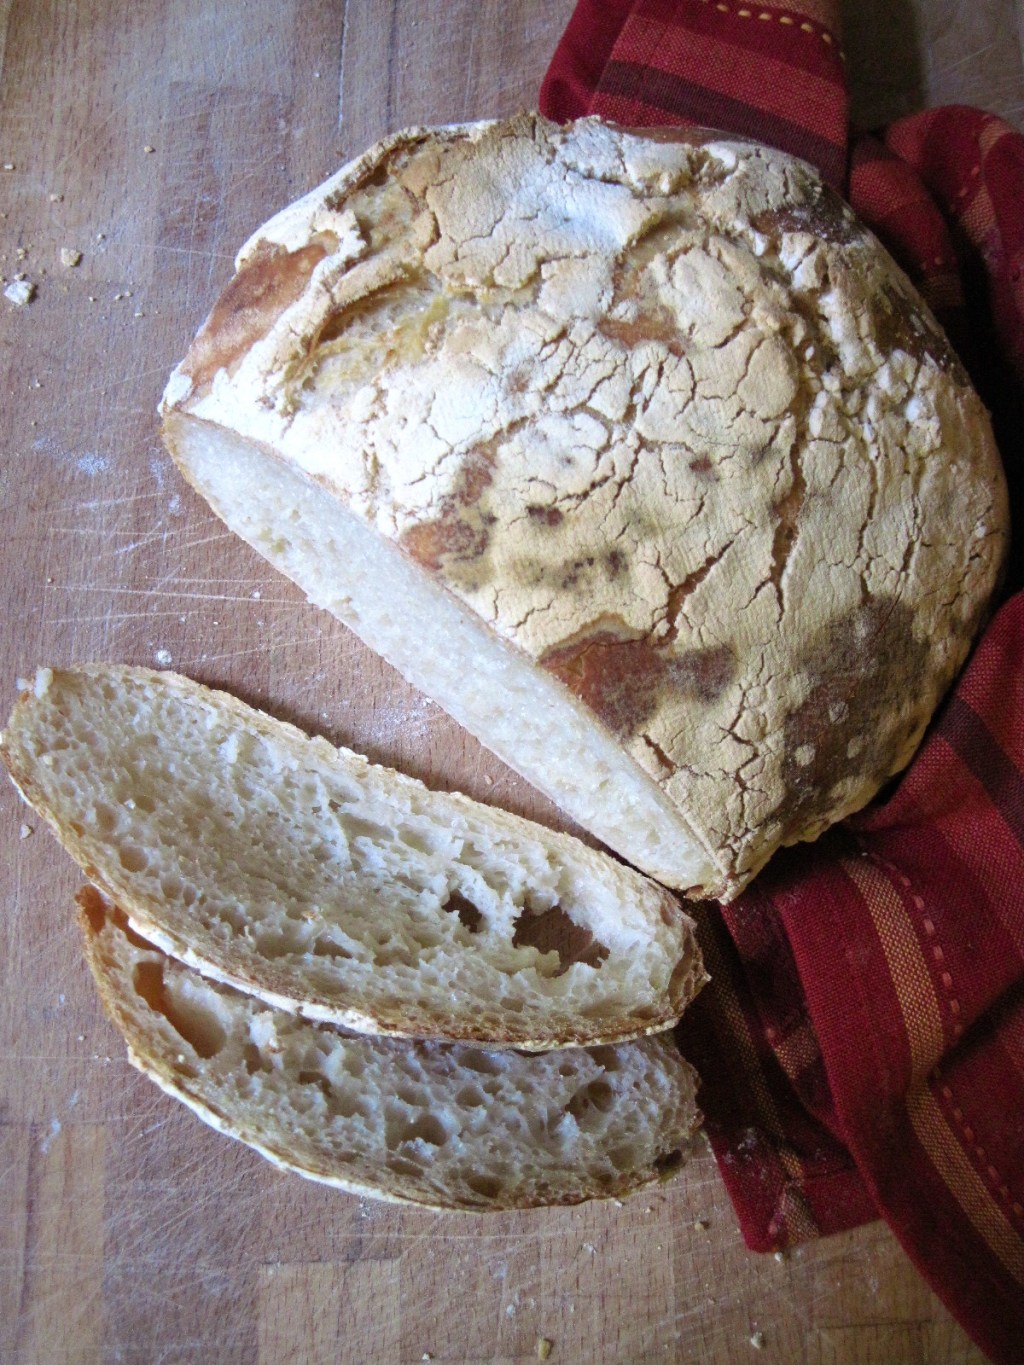
 While I have been keeping my sourdough starter pretty busy baking with Sourdough Surprises every month, it occurred to me that I haven’t actually used it to make a lot of bread, especially considering that I bake bread at least twice a week to keep us in sandwiches and toast. Lately I have been making some variation of Jim Lahey’s no-knead bread (that famous one that was in the New York Times), using yeast and just throwing a little bit of sourdough discard in with the dough for some added flavour, but not actually using the sourdough starter for its leavening power. I really really love Lahey’s no-knead bread (even more than the 5 Minutes a Day bread) so I decided to try to convert it to sourdough. This in itself proved to be a learning process, because it meant converting the recipe from volume measures to weight, and it involved percentages and math, which is not really my strong suit. But I must have done something right because, lo and behold, it worked! The bread came out beautifully crusty, with a soft, chewy, light interior crumb and a nice full flavour thanks to the starter.

To do the yeast-to-sourdough conversion, I consulted this thread at The Fresh Loaf, the basic premise of which is that you can replace the yeast in most recipes with enough starter to equal approximately 20% of the total flour weight in the recipe. This is just a rough guideline, as starters can be quite variable in their leavening capacity and general behaviour and there is no guarantee that you will end up with what you were expecting if you use sourdough in a recipe developed for commercial yeast. But it’s a starting point, anyway.

In this case, it meant that of the 430 grams of flour in the original recipe, roughly 100 grams of that flour could be replaced with starter (20% of 430 grams is 86 grams, but I rounded up to make the math easier). My 100% hydration starter has a 1:1 ratio of water to flour by weight, so I used 200 grams of starter (composed of 100 grams of flour and 100 grams of water). I then subtracted 100 grams EACH of flour and water from the original amounts in the recipe.
Are you still following me here? If not, read that last paragraph again and please tell me if I’m not making sense. My brain kind of hurts trying to figure this stuff out.

Anyway, once I got the numbers down, it was a breeze. What I love about this bread is that it just needs lots of time to sit and rest and do its thing, with minimal intervention from the baker. The original no-knead bread recipe required an 18-ish hour rest, and I let my sourdough version rest for closer to 24 hours because my kitchen is quite cool and sourdough usually just needs a bit longer. My favorite part of the recipe is the stretching and folding (here’s a great demo video) – it magically transforms a gooey, wet, messy puddle (if my math is right, this dough is about 88% hydration, which is very very wet) into something resembling dough, without kneading or incorporating more flour. So cool!

However, you still need to use TONS of flour to keep it from sticking to everything in your kitchen, especially the counter top when you do the stretching and folding, and the napkin-lined colander you use to rest it in (unless you have a real brotform, in which case I am jealous!). If your bread does stick to the napkin when you transfer it to the hot bread stone in the oven, don’t worry. Just pull it off as best you can and no matter how much of a mess it is now, trust me: it will emerge from the oven looking amazingly rustic.

To store the bread so that the crust stays crisp and the inside stays soft, place it cut side down on a cutting board and leave it out, uncovered. It will keep just fine like this for a few days, after which it will make awesome toast.

Happy sourdoughing, my friends!
Shawnigan Sourdough Bread
Method and ratios based loosely on Jim Lahey’s no knead bread. Makes one approximately 1 1/2 lb loaf.
In a large bowl, mix together:
200 grams active, bubbly 100% hydration starter (I fed mine about 8 hours before)
280 grams water
Stir until the starter is completely dissolved in the water.

Add:
330 grams all purpose flour
8 grams salt (1 1/4 tsp)
Stir well to form a sticky dough, then cover the bowl and let the dough sit for up to 24 hours at room temperature. When it is ready for the next step, it should be about doubled in size with a flat, very bubbly surface.

Sprinkle your work surface very liberally with flour, then gently scrape the dough out of the bowl onto the counter, trying not to deflate it. It will be very wet and will likely spread out into a puddle.

Sprinkle it with a little more flour and stretch and fold the dough into a tri-fold, like a letter. To do this, flour your hands well, then gently grab one end of the dough and stretch it up and out. Fold it over onto itself, then do it again with the other end. Repeat. The dough should be looking more cohesive and less runny. If it’s still runny, sprinkle it with a little more flour and give it another fold. Cover it with the upturned bowl and let it rest for about 15 minutes.

Prepare your “bread form” by lining a small colander or bowl with a cotton napkin and flouring it heavily. Gather up the edges of the rested dough and lift it into the bread form. If you used enough flour under the dough, this should be fairly easy. If it sticks, just scrape it up and continue. Sprinkle the top of the dough with flour and fold the edges of the napkin over to cover it. Let it rest for about 2 hours at room temperature – it should grow in size and stay indented if you poke it.

Preheat the oven to 450˚F with a bread stone on the middle rack and a metal roasting pan on a lower rack. When the bread has rested, uncover it and upend the “bread form” on the hot stone. Peel off the napkin – if it sticks, just gently pull it off, trying not to deflate the dough. Pour a mug of hot water into the roasting pan, then close the door and bake for 45 – 55 minutes, until the bread is dark brown.

Cool completely before cutting, if you can resist. Store the leftover bread cut side down on a cutting board, uncovered, for up to a few days.

This post has been YeastSpotted!


Leave a reply to Korena in the Kitchen Cancel reply