
I noted previously that I was having a moment with Stella Parks, aka BraveTart, and wanting to bake all of her stuff. Well, the moment continues, and this cake is the result. I got the BraveTart cookbook for Christmas and have been drooling over it ever since. The things I’ve made from it have been fantastic so far (including Oreos, oatmeal cookies, English muffins, and caramelized white chocolate blondies), and the recipes are wonderfully researched, tested, and always teach me something new about baking and pastry cheffing. So I figured I’d be in good hands using BraveTart recipes for attempt number seven in my quest for the perfect lemon layer cake. And – spoiler alert – while it wasn’t quite perfect, it was pretty darn good.

I made this cake over Easter weekend, using the “Lemon Sunshine” version of the White Mountain Layer Cake (really, how could I resist a recipe with a title like that!) and the Marshmallow Buttercream recipes in the book, filled with a stellar lemon curd recipe from the BraveTart blog. The cake layers use all egg whites (hence being a “white cake”) and bake up with a fine, velvety crumb and a subtle lemon tang. The lemon curd recipe thriftily uses up the egg yolks left over from the cake and cooks up bright, puckery, and thick, perfect for spreading between the cake layers without oozing everywhere. And the marshmallow buttercream is a bit of a revelation – similar in concept to a Swiss meringue buttercream, only instead of beating egg whites and sugar into a meringue, you make homemade marshmallow fluff out of sugar syrup and gelatine, and then beat softened butter into it to make a thick, very stable and extremely pipeable frosting – and it tastes like marshmallows!

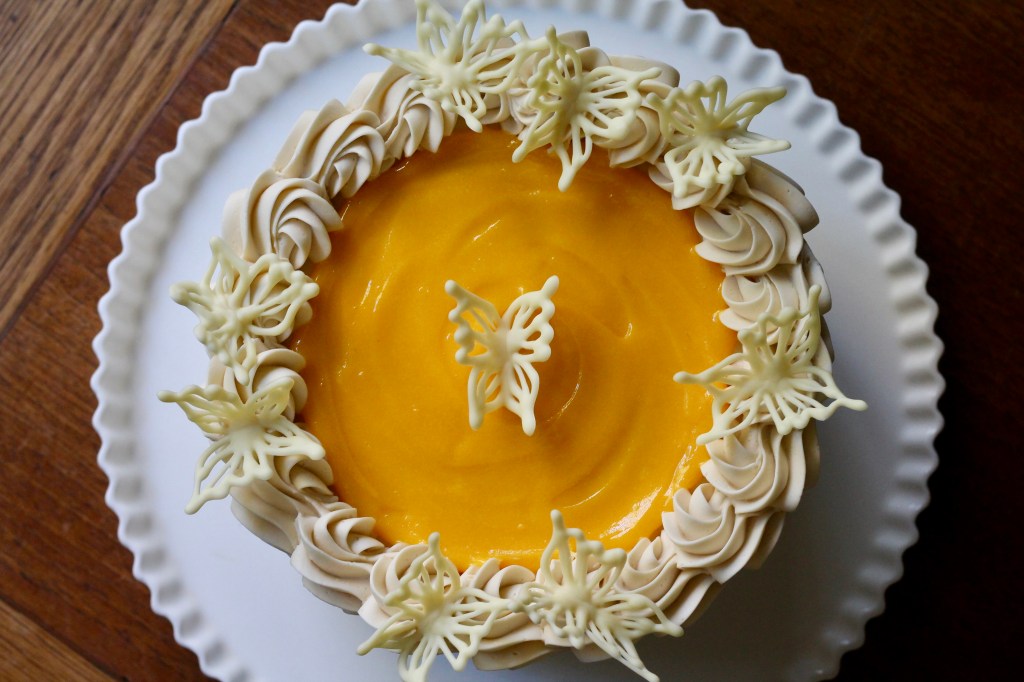
My original plan for decoration was to use Russian piping tips to pipe buttercream tulips over the top of the cake, but it turns out that making something that resembles a tulip rather than a blob of frosting requires practice. So instead, I piped some lacey white chocolate butterflies onto parchment paper, draped them over the middle of an open book to set in a “wings up” shape, and perched them on top of the cake. Definitely better than tulip blobs!

Overall, the cake was tasty, but still not quite my ideal lemon layer cake. This is the second lemon cake I’ve made using white cake layers, and I think I prefer yellow cakes that include whole eggs / egg yolks – they seem to be moister and richer, and a bit less dense. Also, I’d rather bake two nine-inch cake layers and split them to get four (or more) thinner layers, rather than three eight-inch, thicker layers – because more layers equals more opportunity for lemon curd. And the marshmallow buttercream – while pretty amazing – was a bit overpowering and thick for this cake. I can see how it would be good in a cake where it’s just cake and frosting, but I wanted the lemon curd to shine. I think either straight Swiss meringue buttercream or stabilized whipped cream will be the way to go for the lemon cake of my dreams.

So stay tuned – there’s another lemon cake (or maybe two or three, depending on how long it takes me to get it right) somewhere in my future!
Lemon Sunshine Cake with Lemon Curd and Marshmallow Buttercream
Makes one layer 8″ layer cake, about 10 servings. Click here for a printable PDF of the recipe.
The order of proceedings for making this recipe is as follows:
- Make the marshmallow base for the buttercream, then let it cool while you make the cake layers.
- While the marshmallow base cools, make the cake layers.
- While the cake layers are baking, make the lemon curd using the egg yolks leftover from the cake layers. Chill it while the cake layers cool.
- Once the cake layers and the lemon curd are both made and cooled, finish making the buttercream by beating butter into the marshmallow base.
- Assemble the cake.
- Make the white chocolate butterflies to decorate the cake.
Or you can break it up over several days – each part can be made in advance and held, as indicated in each recipe.
Marshmallow Buttercream
From the BraveTart cookbook by Stella Parks.
In a small bowl mix together:
1/4 cup (2 oz) cool tap water
1 tbsp vanilla extract
2 1/4 tsp gelatine (1 envelope)
Set aside and let sit to soften the gelatine.

In a 3 quart pot, combine:
3/4 cup (6 oz) water
3/4 cup + 2 tbsp (10 oz) light corn syrup (I used dark corn syrup and the resulting buttercream was ivory-coloured)
2 cups (14 1/2 oz) granulated white sugar
1/4 tsp kosher salt
Place over medium heat and stir with a fork until it starts to boil, then increase heat to medium-high. Clip and candy thermometer to the side of the pot and cook without stirring until the sugar syrup reaches 250˚F.

Pour the hot syrup all at once into the bowl of a stand mixer, scraping the pot out with a heat-proof spatula. Stick the candy thermometer in the sugar syrup and let cool until it reaches 212˚F. Add the softened gelatine mixture, then with the whisk attachment, whip on low speed until the gelatine melts.

Increase the speed to medium-high and whip until thick, snowy white, and roughly tripled in volume. The mixture with also start balling up inside the whisk.

Scrape the marshmallow base mixture into a greased 4-cup container and cover it tightly. Let stand at room temperature, at least 2 hours to cool completely, or you can leave it for up to 1 week.

To make the buttercream, cut 1 1/2 cups (12 oz) unsalted butter into 1 tbsp chunks and let it soften at room temperature (ideally about 65˚F). Scrape the cooled, room temperature marshmallow base into the bowl of the stand mixer. With the mixer on medium speed, begin adding the butter, 1 tbsp at a time, into the marshmallow base, waiting about 5 seconds between additions.

It will seem like a terrible mistake at first, with the marshmallow and butter refusing to mix together and the marshmallow base trying to climb up the beater, but eventually it will start to mix together – at which point it may look kind of soupy for a bit. Just keep mixing!


Keep going until all the butter is added, scraping down the sides of the bowl a few time. Ideally you will have a lovely, smooth, fluffy buttercream – it should be light and creamy but thick enough to hang from a spoon. Scrape down the bowl to make sure everything is mixed properly, and add a pinch of salt to taste.

If your buttercream is stiff or dense or chunky-looking, the butter was likely too cool when you added it.

Scoop about 1 cup of the mixture into a microwave-safe bowl and microwave it until completely melted. Add this back to the buttercream in the bowl and whip again until light, creamy, and smooth.
If your buttercream is very soft, loose or gooey, the butter was probably too warm when you added it.

Chill the whole thing for about 15 minutes, then whip again, and repeat as necessary until it is light, creamy, and smooth.
At this point the buttercream can be refrigerated in an airtight container for up to 3 weeks, or frozen up to 6 months. To use, bring back to room temperature (about 66˚F) and re-whip.
Lemon Sunshine Cake
Adapted a tiny bit from the BraveTart cookbook by Stella Parks.
Preheat the oven to 325˚F (300˚F convection) with the rack in the lower third of the oven. Line three 8″ aluminum cake pans with parchment paper and grease with baking spray (if you only have two pans, you can bake the first two layers and hold the remaining batter at room temperature while they bake, then re-line and re-grase one of the pans to bake the third and final layer). Ideally, you are supposed to use 3″ high pans, which apparently help the cakes rise more and brown less, but it seemed to work fine for me in 2″ high pans.

In the bowl of an electric mixer, combine:
2 1/4 cups (16 oz) granulated white sugar
2 tbsp grated lemon zest
Rub together with your fingers until fragrant.

Add:
1 cup (8 oz) unsalted butter, at room temperature
2/3 cup (4 oz) virgin coconut oil, solid but at room temperature
2 1/2 tsp baking powder
1 tsp baking soda
3/8 tsp kosher salt
With the paddle attachment, mix on low speed to combine, then increase speed to medium and beat until very light and fluffy, scraping down the beater and sides of the bowl a few times.

Measure out exactly 1 cup (8 1/2 oz) egg whites from about 7-8 large eggs (reserve the yolks for the lemon curd). With the mixer running at low speed, slowly add in the egg whites.

Then increase to medium speed and beat until fluffy again.

Sift 4 cups (16 oz) bleached cake flour and measure out 2 cups (16 oz) low-fat cultured buttermilk. With the mixer on low speed, stir about 1/3 of the flour into the butter-sugar-egg white mixture, followed by 1/3 of the buttermilk.


Repeat twice more, allowing each addition to just be mixed in before adding the next. Mix in 1 tbsp lemon juice.

Scrape down the bowl and beater with a spatula and give it a few final folds to make sure everything is evenly mixed.

Divide the mixture evenly between the three prepared cake tins, about 22 oz each (if you only have two pans, make sure you reserve about 22 oz for the third layer). For extra insurance, wrap each cake pan with a strip of wet towel (this will help insulate the sides of the cake and encourage it to bake evenly).

Bake in the preheated 325˚F (300˚F convection) oven for about 40 minutes, until firm and lightly golden and only a few crumbs stick to a toothpick when poked in the middle (if you want to be exact about it, the temperature in the middle should be 210˚F ). Cool in the pans for about 20 minutes, then run a knife around the edge and gently invert onto a cooling rack. Peel off the parchment paper and reinvent right-side-up. If you only have two cake pans, wash one of then, line with parchment, spray with baking spray, and bake the remaining batter.

Allow the cakes to cool completely before assembling the cake. They can be wrapped tightly in plastic and refrigerated for up to a day ahead of assembly.
Lemon Curd
Adapted from the BraveTart blog by Stella Parks. The brilliance of this lemon curd is that it is equal parts egg yolks, lemon juice, and sugar by weight, so you can scale it up or down depending on the amount of egg yolks you have.
Weigh the leftover egg yolks from the Lemon Sunshine Cake (should be somewhere between 4-5 oz).

Measure out the same weight in granulated white sugar in a medium bowl. Add the grated zest of 2 lemons and rub in with your fingers until fragrant.

Add the egg yolks and whisk until pale.

Juice enough lemons to get the same amount of lemon juice by weight as the egg yolks.

Bring the lemon juice to a simmer in a small pot. Slowly add the simmering lemon juice to the egg yolk-sugar mixture, whisking constantly.

Once all the lemon juice is added, pour it back into the pot and set over medium-low heat. Cook, stirring constantly with a heat-proof spatula, until very thick, like pudding. It should be thick enough to leave a bare trail on the bottom of the pot and mound up on the spatula, about 185˚F.

Press the cooked lemon curd through a strainer to remove the lemon zest and any bits of cooked egg.

Cover with plastic wrap, pressing the plastic directly to the surface of the curd to prevent a skin from forming. Refrigerate until cool.

Cake Assembly
Place your serving plate on a cake decoration turn table and protect it with strips of waxed paper around the edge. Using a serrated knife, level the tops of each cake layer if necessary.
Place the first cake layer on the serving plate. Spoon some of the marshmallow buttercream into a large piping bag fitted with a large round tip, and pipe a circle of buttercream around the very edge of the cake – this will serve as a dam to keep the lemon curd in place. Spoon 1/3 of the lemon curd into the middle of the cake and spread it out evenly.

Invert the next layer of cake and spread a thin layer (1/8″ thick) of buttercream on its bottom.

Place it frosted-side down on top of the lemon curd, pressing gently to adhere. Again, pipe buttercream around the edge of the second cake layer and fill with 1/3 of the lemon curd (reserve the last 1/3 for the top of the cake).

Spread the bottom of the third cake layer with buttercream, place it on top of the cake, and press gently, making sure everything is level.

With an offset spatula, spread a thin crumb coat of buttercream over the top and sides of the cake, filling in any gaps so that the sides are smooth. Chill for about 20 minutes to set the frosting.

Spread enough buttercream over the top and sides of the cake to give it a nice, thin, even covering, saving about 1 cup of buttercream for piping the decorations.

Place the remaining buttercream in a piping bag with a large star tip and pipe small swirls or a shell border around the top edge of the cake. Spoon the remaining lemon curd into the middle and spread it out to the piped buttercream border.

Very gently remove the waxed paper strips from underneath the cake. Set the cake aside in a cool spot while you make the white chocolate butterflies.
White Chocolate Butterflies
Place about 3/4 cup chopped white chocolate in a microwave-safe bowl and heat in the microwave in 30 seconds bursts, stirring after each, until just melted. Pour into a piping bag with a small round piping tip.
Fold a piece of parchment paper in half and make a crease down the fold. Open it up again and spread it flat on your work surface. Using the crease as your centreline, pipe one half of a butterfly shape on one side of the line, then pipe its mirror image on the other side (doesn’t have to be perfect).

Place the parchment paper on an open book, with the crease of the paper in the middle crease of the book.

Set aside somewhere cool until the chocolate hardens, then gently peel the butterflies off the paper.

Arrange on top of the frosted cake as desired.

Storing & Serving
You may refrigerate the finished cake overnight if desired, however be sure to bring it back to room temperature before serving, otherwise the buttercream will be too dense (this will take a couple hours). Cut slices can be wrapped in plastic and refrigerated for up to 2 days.


Leave a comment