 This month marks a new direction for the Daring Bakers, who have now joined forces with the Daring Cooks in a single monthly Daring Kitchen Challenge. Shillpa of Cakeline the Journey kicked off this new format by setting us all the challenge of cake design – specifically the use of “edible clays” such as fondant, gum paste, and/or modeling chocolate to create fully edible cake decorations. I hardly need an excuse to bake a cake, so I was right into this challenge.

If I’m going to put a lot of effort into decorating a cake, however, I want the entire thing to be not only edible, but also tasty. Fondant and gum paste aren’t my favourite things to eat, so that left modeling chocolate. Hard decision, right? It was a bit redemptive for me actually: I’ve made dark modeling chocolate successfully before, but my last (and only other) attempt a white modeling chocolate ended up in a gross, oily, separated mess that landed in the garbage. Modeling chocolate is a simple mixture of melted chocolate and corn syrup, but you do have to treat it with some care to prevent said gross, oily, separated mass. Luckily, I came across Wicked Goodies’ incredible modeling chocolate resource and discovered that the secret seems to be not over-mixing, so this time around the white chocolate modeling chocolate was a complete success.

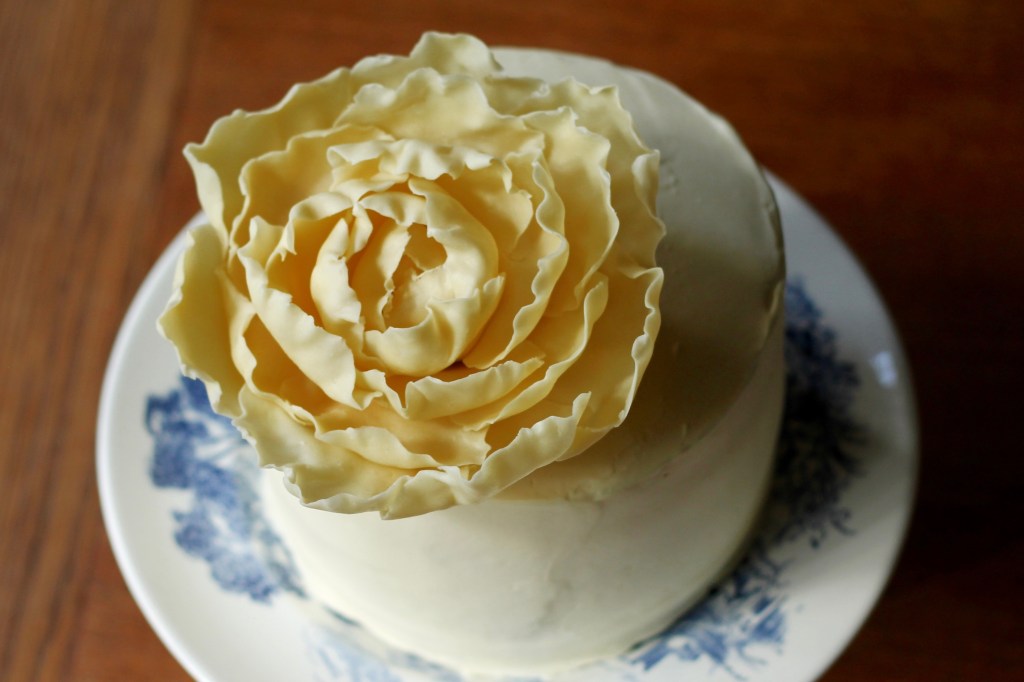
With my successful modeling chocolate, I decided to make a giant peony blossom to decorate my cake. The ruffled, ragged edges of the petals don’t require a lot of precision or high level skills and are fairly easy to make without many specialized tools. But no one will guess that it was a relatively simple project when they see it on a cake: this flower looks very impressive and pretty darn life-like. This particular cake was just a “hey it’s Sunday, let’s have cake” cake, but I think it could also make a gorgeous, simple wedding cake.

Thanks for the challenge Shillpa! Check out the Daring Kitchen for some more beautiful cakes made this month.
How to Make a Peony out of White Modeling Chocolate
STEP 1: Make some modeling chocolate
Recipe from Wicked Goodies. If you want to make dark or milk chocolate modeling chocolate, see that site for the different ingredient ratios.
Place 340 g chopped white chocolate in a microwave safe bowl and heat in 20 second increments, stirring after each, until just melted. You do not want the chocolate to get too hot – just warm enough to melt. In fact, take it out of the microwave when the are still a few un-melted bits, and just stir until totally smooth. (Alternatively, you can melt the chocolate over a double boiler.)

Microwave 116 g corn syrup for 30 seconds, until just warm, the pour into the melted chocolate.

Fold the corn syrup and chocolate together with a stiff spatula until just combined. The chocolate will thicken up as you stir. Do not over-mix, or you might end up with a gross, oily, separated mess.

Scrape the chocolate onto a sheet of plastic wrap, flatten it out, and wrap it up. Allow the chocolate to cool and set at room temperature for 1-3 hours, or up to 24.
Once it is cool, it will be like a soft Tootsie Roll. Break it into pieces and knead it on a silicon mat just until it is smooth and soft enough to work with. If your hands are too warm, it may get too soft – set it aside to rest until it firms up again.

Unused modeling chocolate can be stored tightly sealed in a plastic bag and kept in a cool place out of sunlight. For long term storage (up to a year), place the sealed bag in an airtight container.
STEP 2: Make a peony
From Artisan Cake Company’s YouTube video tutorial.
You will need a few tools:
- a silicon mat
- a spoon
- a piece of foam, loosely covered in plastic wrap (alternatively, you could use a soft, smooth textured cloth or paper towels folded up into a square)
- a ball tool (alternatively, you could use a cocktail stir stick that has a round ball on the end, or something similar)

To make the base for the peony, take a walnut-sized chunk of modeling chocolate and shape into something resembling a peanut: round on two ends and skinny in the middle. Secure one end of the peanut to your work surface. The other rounded end will be the center of the peony around which you secure the petals.
Take another, larger chunk of modeling chocolate and roll it into a log about 3/4 inch thick. To make the petals for the very centre of the flower, cut off 3 x 1/4 inch slices.

Flatten out one side of each slice with your fingers, leaving the base of the petal a bit thicker. Put the petal down flat on the silicon mat and use the back of the spoon to thin out the edges of the petal even further.

Put the petal on your piece of foam and use the ball tool to ruffle the edges of the petal and give it a cupped shape.

Stick the petal onto the peony base, overlapping the 3 petals to completely cover the round bit in the middle.

For the next row of petals, cut off 4 slightly thicker slices of modeling chocolate to make 4 slightly larger petals, and affix them to the peony base in an overlapping fashion. Repeat for a third row with 5 petals…

…and a fourth row with 6 petals, with the petals in each row just slightly larger than the previous ones. By the fourth row, the petals might be getting floppy – don’t worry, we’ll fix that in a minute. Pinch or cut off the excess modeling chocolate from the base of the peony.

For the fifth and final row of petals, create 7 large petals. Line a small bowl with plastic wrap and arrange the 7 petals in the bottom. The curved shape of the bowl will help the petals keep their cupped shape. Place the rest of the flower in the centre of the 7 petals and press to adhere, re-positioning the petals if needed.

Chill the peony in the fridge for about 20 minutes, until firm, before placing on top of your cake.


Leave a comment