 A little while ago I posted a pizza I’d made, and promised to report back with the details on the process once I’d worked out the kinks. I’ve been working with Jim Lahey’s no-knead pizza dough and a few methods for baking it in a home oven that are supposed to mimic the effects of a commercial wood-fired pizza oven. The Sourdough Surprises project this month was pizza, so I took the opportunity to make a sourdough version of the dough.

To clarify, when I say “pizza”, I’m talking Neapolitan–style pizzas: thin-crispy-chewy-airy crust and a few carefully chosen toppings, baked in a wood-fired oven at a zillion degrees so they come out minutes later, smoking hot and slightly charred and delicious. There is one place in Victoria, Pizzeria Prima Strada, that makes pizzas like this, and man, are they good! A Neapolitan-style pizza is very different from the thicker-crusted, toppings-laden pizzas that most people are familiar with in North America. My friend Lynette just got back from three months in Europe, where she ate real Neapolitan pizza, and this was her conclusion on North American versus Neapolitan-style pizza: it’s hard to compare them because they are really two totally different animals, and both are good in their own ways. But right now we are talking Neapolitan-style pizza.

What makes a Neapolitan-style pizza? First off, the dough is lean, meaning that it’s just flour, water, salt, and yeast (or in this case, sourdough) – no fat or oil. Secondly, it is topped sparingly – a thin layer of sauce, two or three toppings, and a bit of cheese (or not). In this case, it can be fun to use good quality, fancy toppings because you don’t need very much of them. Thirdly, is it baked at an incredibly high heat in a specially constructed wood-fired brick oven, usually in mere minutes. This is where making this kind of pizza at home gets tricky – a conventional home oven only goes up to 500˚F or 550˚F max, whereas commercial pizza ovens can hit upwards of 700˚F to 900˚F. (This is also why the toppings are so scarce – too much on the pizza would prevent the dough from cooking properly before it burned to a crisp.) Thankfully, there are many homemade pizza aficionados out there who have dedicated a lot of time and effort to figuring out how to mimic this method at home, which I will cover in another post. For now, let’s talk pizza dough.

As I mentioned, this is a lean dough: just flour, water, salt, and sourdough. I’ve made it with yeast before as well, so I’ve included it as a variation because I know not everyone has a sourdough culture living in the back of their fridge (but you should!!). Like all no-knead breads, this dough requires a good long rest (18 hours or so), so plan accordingly.

Tip number one: Make sure your starter is good and active, and then trust your starter. I was pretty worried when, 10 hours after I’d mixed the dough, it hadn’t changed in shape or appearance at all, but then when I woke up the next morning, the dough had risen to almost double and was full of beautiful bubbles. (If you are making the yeast version, trust your yeast!)
Tip number two: You waited a really long time for the dough to get all full of bubbles, so when you are working with it, be gentle with the dough so that you don’t squash all the air out of it.
Tip number three: This dough has a very high hydration level (ie, there is lots of water for the amount of flour), which means it is very sticky. Use lots of flour on your work surface and sprinkle the dough with flour to prevent it from becoming a sticky mess, but DON’T knead extra flour into the dough – just use the flour to stop the outside of it from sticking to everything.
I think we’re ready to make pizza dough!
No-Knead Neapolitan-Style Pizza Dough
Adapted from Jim Lahey’s “My Pizza“, via several sources. Makes enough dough for 4 smaller pizzas (8” – 10” inches) or 3 slightly larger pizzas (10” – 12” inches), each serving one person. I prefer the smaller size because it is easier to work with when it comes to baking (more details to come!), and find that it is still plenty of pizza for one.
Sourdough version
In a large bowl, combine:
1/4 cup active, bubbly sourdough starter (any hydration level; mine is 100%)
1 1/2 cups warm water
Beat with a whisk to completely dissolve the sourdough in the water, then add:
3 3/4 cups all purpose flour
2 tsp fine sea salt
Mix with a wooden spoon until it comes together in a shaggy, wet mass.

Scrape the dough into a clean bowl, big enough to let the dough rise to at least double. Cover it with plastic and let it sit at room temperature for about 18 – 24 hours until doubled in size (mine took 24 hours but my house is quite cool).

Yeast version
Omit the sourdough starter. Mix together the flour, salt, and 1/4 tsp active dry yeast (instant or otherwise) in a large bowl. Add the warm water and stir. Continue as above.
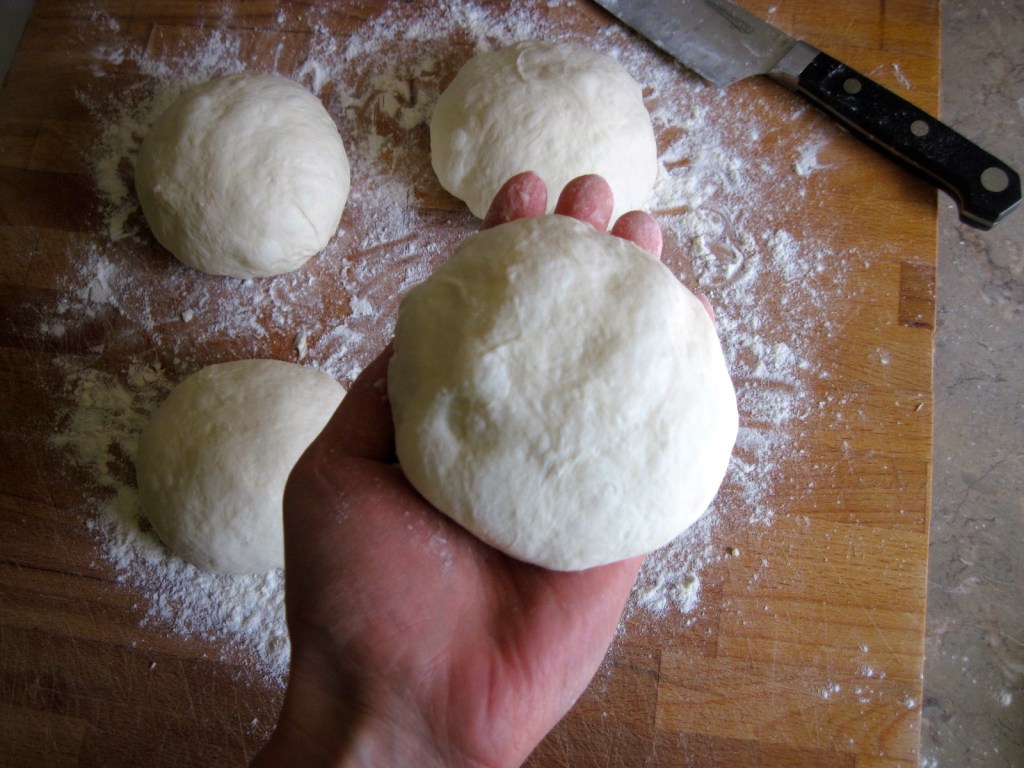
Once the dough has risen to double its size, gently scrape it out of the bowl onto a well-floured surface (be gentle so you don’t squash the air out of it). Sprinkle it with more flour and gently coax it into a circular shape. With a large knife, cut it into three or four equal pieces (try to make each cut one single downward motion – sawing back and forth at the dough will deflate it). Shape each piece of dough into a ball by pinching the corners into the middle, then turning it over and smoothing the edges under. Place back on the well-floured surface, sprinkle with more flour, and cover with plastic wrap. Let it rest for 1 hour before shaping and baking.

If you are not going to use right it away, you can put the covered dough on a floured plate (make sure the balls of dough are not touching) and place it in the fridge for a few hours. To store it for longer in the fridge (up to 3 days), place each ball in a Tupperware container large enough for it to spread out a bit. Let the refrigerated dough sit at room temperature for 2 – 3 hours before using. (You can also freeze the dough: wrap it gently in plastic wrap, then put it in a freezer bag. Let the dough thaw overnight in the fridge, then unwrap it, cover it lightly, and bring it to room temperature as above.)
To shape and bake the pizzas, see this post. And be sure to check out the Sourdough Surprises blog to see all the other sourdough pizzas that were made this month and be inspired by some delicious toppings! Here’s one that I made with pepperoni, bocconcini cheese, and fresh oregano.

This post submitted to YeastSpotting.


Leave a comment