 Our Daring Bakers Host for December 2011 was Jessica of My Recipe Project and she showed us how fun it is to create Sour Dough bread in our own kitchens! She provided us with Sour Dough recipes from Bread Matters by AndrewWhitley as well as delicious recipes to use our Sour Dough bread in from Tonia George’s Things on Toast and Canteen’s Great British Food!
Well. This was QUITE the exhaustive challenge! Not only making bread, but actually cultivating the natural yeasty-beasties that turn it from flour-and-water-glop to bread, and then creating an edible to showcase said bread. See, exhaustive.
Sourdough bread begins with a “starter”, which is essentially a mixture of flour and water left long enough to get all bubbly and alive. Yes, alive – those little yeasties in the starter are living and need to be fed their own weight in flour and water in order to stay lively enough to make bread rise. When I began this challenge, I thought that making a starter involved catching wild yeast from the air (does that sound crazy?), but it turns out that the yeasts in question are actually on the grains that the flour is made from, and the flour-water mixture just wakes them up to they can do their yeasty thang. For this reason, whole, organic grains are best for making a starter: less processing equals more natural yeast in the flour, which means a more active and effective starter. You can turn a whole grain starter into a white flour starter (which is a little more versatile) by simply feeding it white flour after it has been established.
If you’ve been following along, you might have deduced that the starter grows in size with every feeding. Because of this, you either need to bake with the excess or discard some of the starter before every feeding, otherwise you’d end up with a monster starter that would demand increasingly huge amounts of flour and water. If you are planning on doing some baking, the extra starter is what you use to make bread, crumpets, pancakes, cakes, etc – the key is always saving a bit of starter to keep feeding for next time. Over time, the flavour of the starter develops and it becomes more active. This is how some starters manage to last for hundreds of years (provided their caretakers remember to feed them!), the extra passed on from person to person, taking on different characteristics depending on the flours used, but ultimately all from one “mother batch” of starter – for example, Carl Griffith’s 1847 Oregon Trail starter, which can be ordered online and has been kept alive for over 160 years!
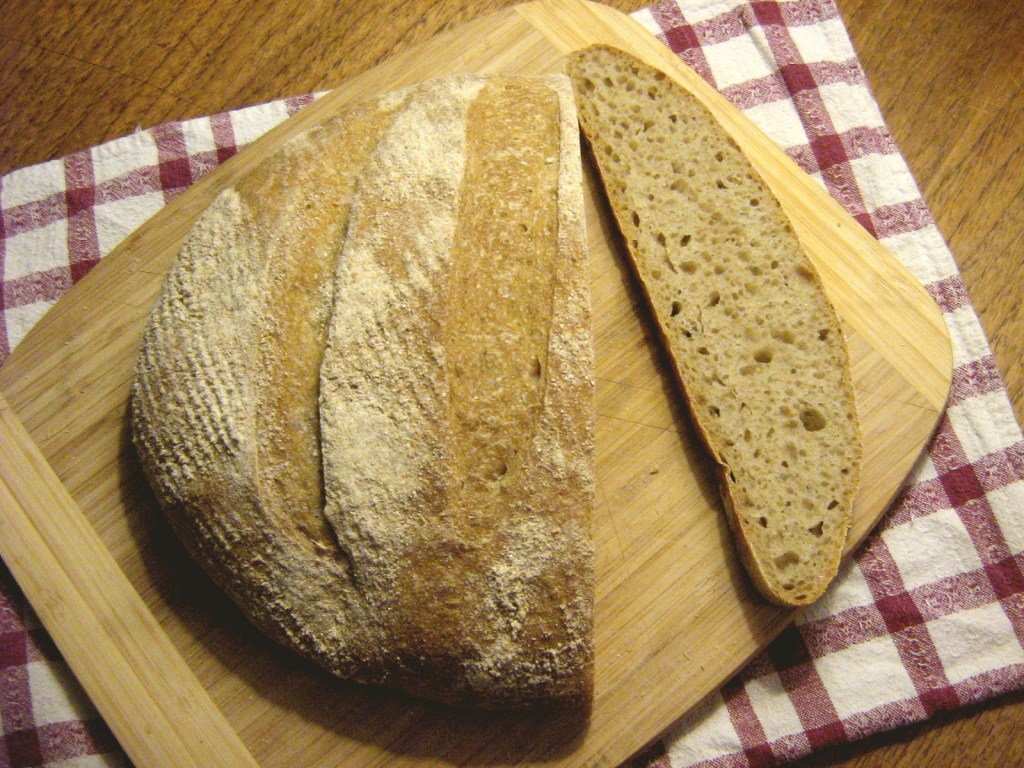
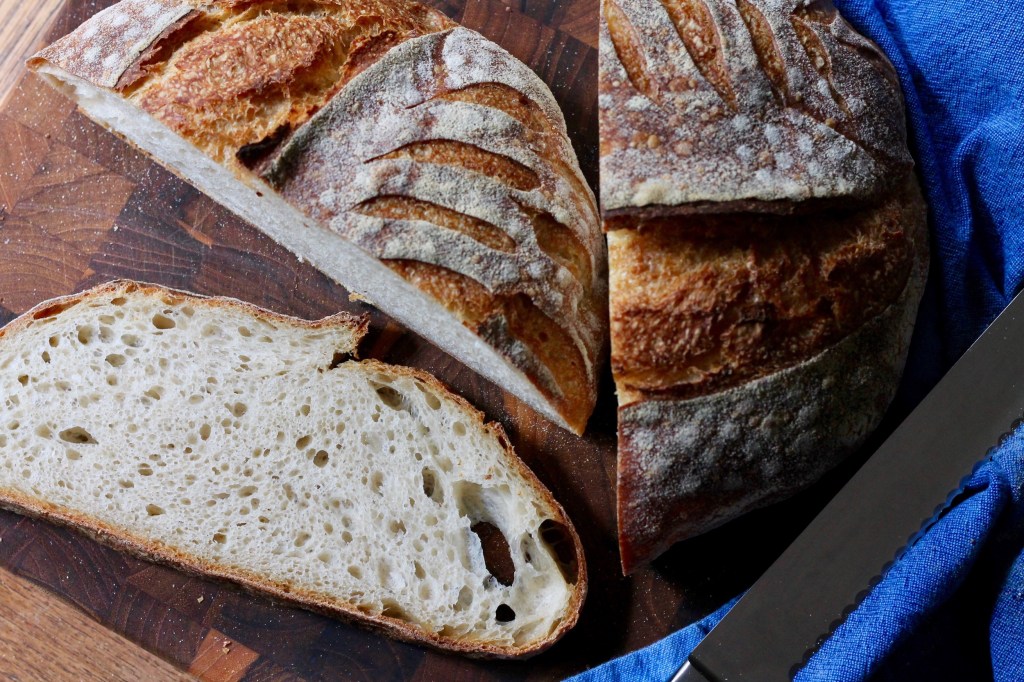
When I think of sourdough, I think of San Fransisco-style sourdough – dense and chewy with a pronounced sour tang. However, this is not the case with all sourdough, aka natural starter, breads – that sour taste is just one of many flavour nuances that can be possible with a natural starter. The taste has to do with the age of the starter used and the different kinds of microorganisms living in it, which can vary by region and flour type – hence the sourness of San Fransisco sourdough versus the subtle fermented flavour of a rustic French natural starter bread. This French Country Bread falls into the former category of subtle fermentation: it was made with a very new starter, but still had a nice flavour – not sour, but delicious. And it will only get better as the starter ages :). Another great thing about this bread was the texture: it had an open, airy crumb, which is desirable in a rustic European style bread, and a slightly waxy texture, which is the mark of a good sourdough, apparently!
Jessica, our host, gave fantastic instructions for making this loaf, from starter onwards, including some very helpful instructional videos. Because her instructions were so great, I’m going to post them here basically as written, with a few of my own notes added. Such as: this is a VERY WET dough and it’s supposed to be that way. The best way to deal with it and stop it from sticking to every part of you is to use wet hands rather than extra flour. Also, because of how wet it is, it will spread out into a flattish loaf – but again, this is how it is supposed to be!
Notes from Jessica on bread making:
- Good bread starts with good flour. Beyond trying to find good quality, local (organic if possible) flour, Whitley recommends finding out three things: how was it milled? (stoneground ideally, to retain more nutrients); how much of the original grain is left in the flour (ideally 95-100 % for bread making); and lastly, how much protein is in the flour? (the more protein, the more gluten, leading to a more stretchy dough – ‘strong’ or ‘bread’ flour indicates a higher level of protein).

- Normal tap water in the starter and bread is fine in most cases, unless you live in a municipality that heavily chlorinates the water. Chlorine will kill almost all bacteria, including your yeast, so you’ll want to use filtered water if you can. Whitley says that leaving water in a pitcher overnight can rid most of the chlorine.
- If you clean your kitchen with anti-bacterial products or harsh cleaners, try not to do it before baking and make sure your bowls are clean but have no chemical residue left on them! Many a bread has been deflated by an overly-sterilised kitchen.
- The recipe calls for sea salt because it retains a higher level of minerals and has a stronger salt taste, meaning you can use less of it. Never add salt directly to your starter – it will kill the yeast, so use the following method: dissolve your starter in water, stir your salt through your flour, then mix the wet with the dry ingredients.
- When working with the dough, you might feel inclined to heavily flour your work surface or your hands. Resist this urge! Sourdough is meant to be wet and sticky – this helps to give the bread a nice crumb once it has baked. Most doughs can be worked by hand, but sometimes a dough scraper is used to help lift and fold the dough. To pick up or shape a loaf, damp hands work better than floured ones!
- If you don’t have dough scrapers, old bank cards/credit cards work just as well! But wash them thoroughly first.
- Try to work with your hands to make these recipes – mixing and kneading the dough by hand means you’ll get a better sense of how your dough should feel! We learn by doing!
- Remember, a lot of these timings are guidelines – pay attention as, depending on temperature and your starter, you may need more or less time to proof your dough. You want a dough that resists poking a bit (if you poke it, the hole will disappear) but not one that quivers all over and seems really fragile.
- Timing: for the French Country Bread, refresh the starter in the morning, make the final dough at lunchtime, and bake at dinner time.
Notes on maintaining your starter:
- Once you’ve finished baking, you’ll have some leftover starter. Keep this in a Tupperware container, as this is what you will use to start your next loaf (and so on…)! Some of the best starters are hundreds of years old – and they get better with time.
- Feeding your starter: unless you are intentionally trying to build-up the amount of starter (for example, to use in a certain recipe), you want to discard about 2/3 of the starter before each feeding, otherwise it will triple in size every time you feed it. To feed, discard part of the starter and then add flour and water in equal parts by weight to the remaining starter (1:1:1 of starter:flour:water by weight, eg: 100 grams of each). The discarded starter is used to bake with (or can be passed on to a friend to keep). You can maintain your starter on several different schedules. If you bake daily, keep your starter at room temperature and feed daily. If you bake weekly, keep it in the fridge and feed it once a week (this is what I’m doing). You can also freeze starter if you bake very infrequently, but it does fine in the fridge so long as you feed it at least once a month – before you bake, simply refresh your starter according to the recipe – or feed it with equal parts by weight of flour and water – and let it come back to life at room temperature.
- This whole grain wheat starter can be turned into a white starter by simply feeding it on white flour after it is established.
- You might notice that your starter starts to smell a bit like acetone – this is completely normal. It may develop a grey liquid on top (called “hootch”!), which you can either pour off or stir back into the starter. To refresh the starter before baking, discard half of the original starter and add in fresh flour and water for the yeast to feed on.
- Sometimes, very rarely, a starter might get moldy. This is often due to being left at room temperature without feeding. If there is a lot of mold throughout the starter, probably best to discard it. But the odd bit is not always a problem. It is nearly impossible to kill a starter, unless you get salt or chemical products in it – so don’t fret! Often it is just a matter of feeding it over a few days and nursing it back to life.
French Country Bread
Recipe from Bread Matters by Andrew Whitley. Makes 1 large loaf plus extra starter for your next baking project. The starter takes minimum 4 days to get going, and the bread takes about 12 hours (only about 1 hour active time).
The Starter
Day 1:
4 1/2 tablespoons (70 ml) (40 gm/1 ½ oz) stoneground breadmaking whole-wheat or graham flour
3 tablespoons (45 ml) water
Total: scant ½ cup (115 ml) (3 oz/85 gm)
In a Tupperware or plastic container, mix the flour and water into a paste.
Set the lid on top gently, cover with a plastic bag, to prevent messes in case it grows more than expected!
Set somewhere warm (around 86 F if possible). Even if it’s not that warm, you’ll still get a starter going – it might just take longer. My house was definitely not that consistently warm and it worked fine.
Day 2:
4 1/2 tablespoons (70 ml) (40 gm/1 ½ oz) stoneground breadmaking whole-wheat or graham flour
3 tablespoons (45 ml) water
scant 1/2 cup (115 ml) (3 oz/85 gm) starter from Day 1
Total: scant cup (230 ml) (6 oz/170 gm)
Stir the flour and water into the mixture from Day 1, cover, and return to its warm place. The mixture will be quite thick and stretchy.

Day 3:
4 1/2 tablespoons (70 ml) (40 gm/1 ½ oz) stoneground breadmaking whole-wheat or graham flour
4 teaspoons (20 ml) water
scant 1 cup (230 ml) (6 oz/170 gm) starter from Day 2
Total: 1⅓ cup (320 ml) (230 gm/8-1/10 oz)
Stir the flour and water into the mixture from Day 2, cover, and return to its warm place. It will still be very thick and stretchy, and may be starting to smell sour/yeasty and/or look bubbly. Don’t worry if neither of these things happen!

Day 4:
3/4 cup plus 1½ tablespoons (205 ml) (120 gm/4 ¼ oz) unbleached all-purpose flour
1/2 cup less 4 teaspoons (100 ml) water
1⅓ cup (320 ml) (230 gm/8 oz) starter from Day 3
Total: scant 2⅔ cup (625 ml) (440 gm/15½ oz)
Stir the flour and water into the mixture from Day 3, cover, and return to its warm place. At this point it should be bubbling and smell yeasty. If not, repeat this process for a further day or so until it is! (You will have to discard some of the starter before each feeding if you continue feeding it on this daily schedule).

The Bread
Stage 1: Refreshing the Leaven
1 cup less 1 tablespoon (225 ml) (160 gm/5 ⅔ oz) wheat starter
6 tablespoons less 1 teaspoon (85 ml) (50 gm/1¾ oz) stoneground bread making whole-wheat or graham flour
1 cup plus 2 teaspoons (250 ml) (150 gm/5 ⅓ oz) unbleached all purpose flour
1/2 cup (120 ml) water
Production Leaven Total: 2¾ cups plus 4 teaspoons (680 ml) (480 gm /1 lb 1 oz)
Mix everything into a sloppy dough. It may be fairly stiff at this stage. Cover and set aside for 4 hours, until bubbling and expanded slightly. This mixture is called the production leaven.
Stage 2: Making the Final Dough
3/4 cup less 1 teaspoon (175 ml) (100 gm/3 ½ oz) stoneground breadmaking whole-wheat or graham flour, plus more for dusting
2 cups plus 2 tablespoons (510 ml) (300gm/10 ½ oz) unbleached all-purpose flour
1¼ teaspoons (7½ ml) (7 gm/¼ oz) sea salt or ⅔ teaspoon (3⅓ ml) (3 gm/⅛ oz) table salt
1 ¼ cups (300 ml) water
1 ¾ cups (425 ml) (300 gm/10 ½ oz) production leaven from Stage 1 (this should leave about 1 cup for your next loaf, which I added it back into my starter along with enough water to achieve the original consistency)
Total: 6 cups less 2 tablespoons 1415 ml (1007 gm/35 ½ oz/2 lb 3½ oz)
Mix the dough with all the ingredients except the production leaven. It will be a soft, wet dough. Knead on an UNFLOURED surface for about 8-10 minutes, getting the tips of your fingers wet if you need to. You can use dough scrapers to stretch and fold the dough at this stage, or air knead if you prefer. Basically, you want to stretch the dough and fold it over itself repeatedly until you have a smoother, more elastic dough. See Jessica’s demonstration here: http://www.youtube.com/watch?v=OqS3raEGdwk
 Smooth your dough into a circle, then scoop your 1 3/4 cups production leaven into the centre. You want to fold the edges of the dough up to incorporate the leaven, but this might be a messy process. Knead for a couple minutes until the leaven is fully incorporated in the dough (at this point I could have added a little bit more flour to my dough). See Jessica’s demonstration here: http://www.youtube.com/watch?v=UPO97R4iO4U
 Spread some water on a clean bit of your work surface and lay the dough on top. Cover with an upturned bowl, lining the rim of the bowl with some water. Leave for an hour, so that the gluten can develop and the yeasts can begin to aerate the dough.
 Once your dough has rested, you can begin to stretch and fold it. Using wet hands and a dough scraper, stretch the dough away from you as far as you can without breaking it and fold it back in on itself. Repeat this in each direction, to the right, towards you, and to the left. This will help create a more “vertical” dough, ready for proofing. See Jessica’s demonstration here: http://www.youtube.com/watch?v=rDoJRCMfclE
 Heavily flour a banneton/proofing basket with whole wheat flour and rest your dough, seam side up, in the basket (I used a basket lined with a floured tea towel, but a bowl or colander would work too!). Put the basket in a large plastic bag, inflate it, and seal it. Set aside somewhere warm for 3-5 hours, or until it has expanded a fair bit. It is ready to bake when the dough responds to a gentle poke by slowly pressing back to shape.
 Preheat the oven to hot 425°F/220°C/gas mark 7. Line a baking sheet with parchment, then carefully invert the dough onto the sheet (put the baking sheet on top of the basket, then gently flip it over so as to disturb the dough as little as possible). Make 2-3 cuts on top of the loaf (a serrated bread knife works well for this) and bake for 10 minutes, then reduce the temperature to moderately hot 400°F/200°C/gas mark 6 and bake for an additional 30-40 minutes, until browned and crusty. The crust will appear rock hard when it first comes out of the oven, but will soften slightly upon cooling.
 Cool on a cooling rack, then slice and behold the beauty that is contained within. Large, irregular holes are the mark of a good artisan bread 🙂
Use the bread to make a delicious breakfast of a fried egg, sauteed mushrooms, and cheese sauce on toast :).
Thanks Jessica for such a fun challenge and providing such great guidance! Also, Audax Artifex had some wonderful tips, as usual. I plan on keeping my little sourdough friend alive, so stay tuned for upcoming posts on ways to use sourdough starter! And be sure to check out the Daring Kitchen for all the other sourdough loaves this month 🙂
Some helpful sourdough/natural starter resources:
Sourdough Starter 101 and The Sourdough Forum at the Fresh Loaf
Raising a Starter at Wild Yeast
Starting a Starter at Breadcetera
Video on how to handle and knead high hydration (ie, wet) dough




Leave a comment