 The Daring Bakers go retro this month! Thanks to one of our very talented non-blogging members, Sarah, the Daring Bakers were challenged to make Croissants using a recipe from the Queen of French Cooking, none other than Julia Child!
I have been wanting to try making croissants for a long time, so this was the perfect challenge! It became immediately apparent, however, that croissants can be very finicky. To make then, you encase butter in dough and then roll it out and fold it and let it rest and roll it out and fold it and let it rest and repeat several more times, all the while making sure that the butter in the dough doesn’t get too soft and melt or get too hard and shatter and that you keep it evenly layered, so that in the end you hopefully end up with beautiful, flaky, light crescents of buttery, airy, honeycomb-textured pastry. No wonder croissants are considered daunting by many home bakers! However, Sarah, our host this month, provided some great instructions, and the wonderful Daring Bakers community contains some people who have already conquered the croissant, so they were doling out advice and tips left, right, and centre. That’s what’s so great about the Daring Bakers – no matter what the challenge or how impossible it might seem, there’s someone who’s done it before and can offer some expertise. In this case, I’m referring to Audax Artifex (who seems to have good advice for every challenge!) and txfarmer, who posted about her amazing croissants here, here, here, and here. If you want to make croissants, I would recommend reading her first post because she gives a great how-to with a ton of tips 🙂 (I would also recommend watching this video of Julia Child making croissants, because she is awesome).
  One of the tips I picked up on was not to make croissants during a heat wave (soft, melty butter is not a croissant-maker’s friend), which is what we experienced the first week of September (seriously, after one of the coolest summers I can remember, the same week that school started back up we had the hottest weather of the year!). So I held off for a few weeks, hoping that the temperature would cool off a little – enough with this summer weather already, I have baking to do! Geesh. Anyway, I got my wish (sorry?) because there is now a distinct autumnal bite in the air, and I was able to make croissants without worrying about the butter getting too soft.
 Although I have to admit that the hardest part of the entire process was not the rolling or folding or shaping… it was the very first steps of the recipe in which you combine yeast, water, flour, milk, oil, sugar and salt. Probably the easiest part of the whole endeavour – essentially, just stir it all together – but due to “user error”, aka my inability to 1) read a recipe properly, and 2) use a measuring cup properly, I had to do it THREE TIMES before I got it right! 😛 In my defense, it was a Friday evening and apparently I was very tired and rather brain-dead after a long week at work ;).
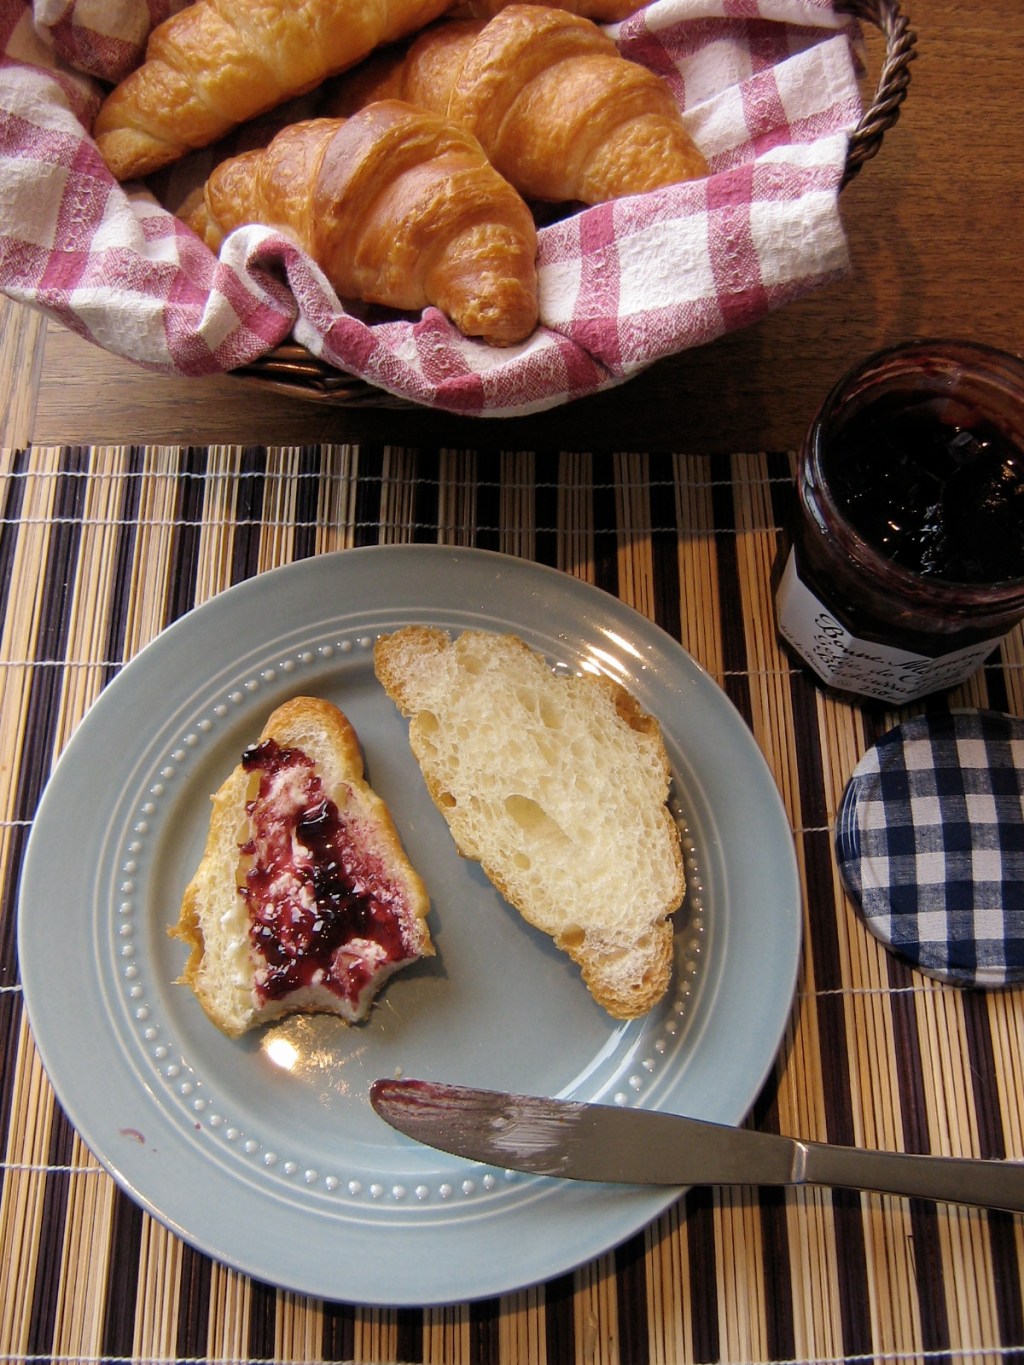
 This has to be one of the most rewarding things I’ve made in a long time – when I peeked through the oven window while they were baking and saw them all puffed up and looking like proper croissants, I actually did a happy dance (which scared the bejeezus out of the cat!). When they came out of the oven, I was even more pleased – light, flaky, buttery and delicious.

After the success of my first batch, I made two more batches. One was plain dough filled with chocolate and hazelnut cream (like frangipane but with hazelnuts instead of almonds) to make pain au chocolat et crème de noisettes.  The other I made with whole wheat flour and filled with prosciutto, blue cheese, and pear.
  Both came out really well – nice and flaky with a good crumb. The whole wheat dough was super easy to work with, but it didn’t puff up quite as much as the plain dough.
This was a really fun challenge and I will definitely be making croissants again! To see the original challenge recipe and a gallery of the Daring Bakers’ croissants, head over to the Daring Kitchen. Thanks for hosting this challenge, Sarah!
Croissants
Recipe from “Mastering the Art of French Cooking, Volume Two” by Julia Child and Simone Beck, with some slight adaptations to the given instructions. Original recipe yield is 12 croissants, but they must be tiny as I only made 8 per batch and they weren’t very big!
Some notes:
- Croissant-making is a pretty lengthy process, and to do it in one day takes about 12 hours, start to finish – or you can spread it out over several days by taking advantage of the “refrigerate overnight” option(s), which is what I did.
- If it is very warm when you are making croissants, you may need to chill the dough after every single fold so that the butter doesn’t get too soft/warm. On the other hand, if the butter is too cold when you roll out the dough, it will shatter within the dough rather than spreading out evenly (you will be able to see this through the dough) – if this happens, let the dough sit at room temperature to take the chill off the butter before continuing with the rolling.
- When rolling out the dough, try to make the corners as square as possible, and trim the edges before folding – this will make your folds neater and ensure that the layers in the dough are evenly distributed.
- Another thing to consider is the type of flour to use. Some people prefer to use bread flour, which is high in gluten. This makes for a good crumb and texture, but also makes the dough harder to roll out. I used Canadian all purpose flour, which is 13% gluten, and had great results.
- Lastly, if you want to freeze your unbaked croissants, do it after shaping/before proofing: place them in the freezer on the baking sheet and freeze until firm. When you want fresh croissants, allow them to thaw at room temperature and continue with the recipe starting at the proofing stage.
In a small bowl, mix together:
3 tbsp very warm water
1 1/4 tsp dry active yeast (I used instant yeast and it worked fine)
1 tsp sugar
Set aside for the yeast to “proof” – that is, prove that it works by getting all foamy. Meanwhile, combine and heat until tepid:
1/2 cup milk
1/2 tsp salt
1 tsp sugar
Measure into a large bowl:
1 3/4 cups all purpose flour (can replace 1/2 cup with whole wheat flour)
Stir in:
the foamy yeast mixture
the milk mixture
2 tbsp neutral-flavoured oil (I used sunflower)
Mix just to combine into a soft dough. Turn out onto a lightly floured surface and “knead” the dough 10-12 times – as illustrated in the Julia Child video, essentially pick up the dough and throw it down, rather than folding and pressing it with your hands. The dough should be quite soft and silky-feeling – you want to hit a balance with the “kneading” between just enough gluten development and not too much. Gather the dough into a ball, put it in a bowl, and cover it with plastic. Let it rise for about 3 hours (or overnight in the fridge) until tripled in size.
 After it has risen, remove it from the bowl and place on a floured surface. With your fingers, press it into an 8″x12″ rectangle. Fold the dough into thirds – fold the bottom edge up and the top edge down, like a letter (aka letter fold).
  Place the dough on a plate, cover with plastic, and let rise another 1 1/2 hours, until doubled in size.
After this second rise, place the dough in the fridge to chill while you prepare the butter:
1/2 cup chilled, unsalted butter
Place the butter between 2 sheets of waxed paper and tap/roll it with a rolling pin into a 5″ square. This will also soften the butter slightly – don’t let it get so soft that it gets melty at all. You want the butter and the dough to be about the same texture/consistency, so place the butter square in the fridge if necessary to firm it up. Place the chilled dough on a floured surface, let it rest a few minutes, then shape it into a 8″ square with your hands. Place the butter square in the middle of the dough, then fold up the dough and seal in the butter. With a rolling pin, roll out the dough into an 8″x14″ rectangle.
 Trim all the edges so you can see the layer of butter inside, then make another letter fold (fold the bottom edge up and the top edge down).
  Turn the dough rectangle so that one of the short edges is facing you and the “open” long edge is on your right. Roll out again into an 8″x14″ rectangle, trim the bottom (short) edge, and repeat the letter fold.
  These are your first two “turns”. Place on a plate, cover with plastic, and let the dough rest in the fridge for 1-2 hours. This resting period will make it easier to roll out.
Remove the dough from the fridge and let it sit for a few minutes. Place it on a floured surface so that again the short edge faces you and the “open” long edge faces right. Repeat the rolling and folding (as above) twice more – these are turns three and four. Place the dough on a plate, cover with plastic, and place in the fridge for another 1-2 hours (or place something heavy on top of it and leave it in the fridge overnight).
Take the dough out of the fridge and let it sit for a few minutes. On a floured surface, roll it out into a 5″x18″-ish rectangle, then cut it in half into two squares(ish). Place one square back in the fridge. Roll the other out into a 10″ square. Trim the edges so you can see the butter layers. Cut the square into two rectangles, then each rectangle into two triangles. Stretch each triangle into more of an isosceles triangle (long sides of equal length) and roll up, starting from the wide end and finishing with the pointed tip tucked underneath. Your finished croissant should have 7 little rolled “steps”. If you want the croissant to be more curved in a crescent shape, make a small notch in the wide base of the triangle and direct the first roll out towards each side.
 Place the rolled croissants onto a parchment paper-lined baking sheet, cover them lightly with plastic, and let them proof in a warm place for 3 hours (the longer the better), until quite puffy and jiggly and the layers of butter and dough are visible. Don’t let it get too warm or the butter will melt into the dough and all your careful folding and rolling efforts will be for naught!
 Make an egg wash by mixing together:
1 egg
1 tsp water
Brush the egg wash over the croissants in a thick, even coating. Preheat the oven to about 490˚F then turn down to 475˚F when you put in the croissants. Bake the croissants for 12-15 minutes at 475˚F, until deeply golden brown. Cool on a rack and eat them while they’re fresh :).
Filled Croissants
Pain au Chocolat et Crème de Noisettes
Hazelnut Cream (adapted from Chocolate & Zucchini)
In a food processor, pulverize 1/3 cup whole hazelnuts until finely ground. Add 1/4 cup granulated sugar and a dash of salt. Process to mix. Add 1/4 cup butter, cut into pieces, and mix until well blended. Add 1 egg and process until smooth and creamy. Store in a covered container in the fridge until needed.
To assemble:
hazelnut cream (you won’t need all of it)
1 oz dark chocolate, chopped
Roll out the croissant dough as above, but form each half into an 8″ x 12″ rectangle instead of a 10″ square. Cut each rectangle lengthwise into four strips. Spread about 1 tsp of hazelnut cream over the bottom inch of each rectangle and top with about 1 tsp of chopped chocolate. Roll up the dough to seal in the filling and place on a parchment paper-lined baking sheet. Proof, egg wash, and bake as above.
Prosciutto, Pear, and Blue Cheese Croissants
Roll and cut the croissant dough into triangles as above. At the wide end of each triangle, place a thin slice of prosciutto and top with a sliver of pear and a sliver of blue cheese (or about 1 tsp crumbled). Roll up the dough to seal in the filling and place on a parchment paper-lined baking sheet. Proof, egg wash, and bake as above.




Leave a comment