
*** UPDATE: CLICK HERE FOR A NEW METHOD THAT ACTUALLY WORKS!!
** EDITED TO ADD: After having frosted the wedding cake using this frosting, I have to say that I do not recommend this recipe – it just plain did not work very well and was extremely hard to work with, unfortunately 😦 I almost want to take down the recipe, but this was a pretty epic post and I’m kind of proud of it, so I’m going to leave it. The frosting tasted awesome (like liquid cheesecake – emphasis on the liquid) but it would not thicken up enough to spread easily; it would not un-curdle no matter how long I stirred it, chilled it, or left it at room temperature; and it was so soupy that I had to frost the cake in several coats, chilling between each coat to build up the frosting layer. And because it was curdled, it didn’t have a smooth finish (which was OK because the look of the wedding cake was kind of rustic, but it was still annoying). Bottom line: cream cheese has too much water in it to make a proper Swiss meringue buttercream, which relies on the high fat content in the butter to emulsify with the egg whites. If you’re looking for a cream cheese Swiss meringue buttercream frosting recipe, check out this one – it works around the cream cheese/high water content problem.**
Alternative titles for this post:
Zen and the Art of Cream Cheese Swiss Meringue Buttercream
or
Testing Your Patience with Cream Cheese Swiss Meringue Buttercream
or
How to Give Yourself Gray Hairs and an Anxiety Disorder
So. After the wedding cake trial I did a while back, I discerned that I needed to find a cream cheese frosting not made with confectioners’ sugar – more specifically, that I wanted to make a Swiss meringue buttercream frosting with cream cheese. A quick Google search turned up a recipe for Cream Cheese Swiss Meringue Buttercream, and lo and behold, this very frosting had been used on a wedding cake! Double score!!
For those who don’t know, a Swiss meringue buttercream frosting is made by beating butter into a whipped meringue base of egg whites and sugar (heated to 140˚F to make them safe). I was a bit apprehensive at the thought of this, mostly because of the amount of egg whites that are required (being that I’m on a budget, and egg whites are more expensive than confectioners’ sugar). However, this frosting is seriously delicious – creamy, light, buttery, and not overly sweet; basically it blows any confectioners’ sugar frosting out of the water – so I was willing to overcome my initial qualms in favour of deliciousness. I had made Swiss meringue buttercream once before, back when I was in high school, and I don’t remember it being terribly difficult or onerous – I was only about 16, so it can’t have been *that* hard – but I had also read a few posts about how this type of frosting can be the most demoralizing endeavour because it just. won’t. come. together, and I knew I needed to do a test run.
I scaled down the recipe to use only 1 egg white and got down to business. A full 3 hours of beating/whisking/stirring later, I still had soupy, curdled glop (albeit delicious, cheesecake-flavoured glop). I was reluctant to give up, because this recipe and all others I had read tell you to just keep beating it and not lose hope – it will eventually work out. But I had to go to bed, so I declared this small test batch a failure. I did not, however, lose faith in the recipe or the method: I figured that the amount was too small, that the beaters of the KitchenAid weren’t able to get into the mixture far enough to really do anything, that it was just too hot in the kitchen and the butter and cream cheese were melting. I made plans for a second test run with a slightly larger batch.
At this point, I got a few tips from Jackie of Foodology, including a link to Sweetopolita’s post Swiss Meringue Buttercream Demystified. Reading this helped a lot, and introduced the idea of chilling the mixture when it gets too soupy. I started on the second test batch with renewed hope and things went marginally better – however it was really hot in the kitchen (mid-day at the end of July) so I had to alternate between bouts of chilling and beating the tar out of the frosting in the KitchenAid. And finally, over two hours later, it started to come together. Whew! Up until this point, I was planning on making the frosting in Vancouver, but now I decided I was going to make it beforehand and just refrigerate it, because if it didn’t come together when I needed it to, I would seriously lose it.
So, based on all I had learned, I made a larger batch (half of what I needed in total, to accommodate the size of my mixer), starting early in the morning to avoid the hot kitchen issue. You are supposed to let your butter/cream cheese come to room temperature, but I decided not to let either get too soft, thinking that the heat of the kitchen would be less of an issue that way. I whipped up the meringue, beat in the butter and cream cheese, and then set the mixer on high to do its thing. And two hours later, nothing. Still a curdled mess. I took the whisk attachment off the mixer and half-heartedly stirred at the frosting by hand a few times – and EUREKA! With slow stirring, the frosting somehow started to come together in a thick, fluffy mass. I put on the paddle attachment and turned the speed to low, and a (long) while later, I had proper frosting!! But seriously, it still took all bloody day. And I still had another batch to make.
But now I *finally* had it figured out. While the previous batch was going, I read this Swiss meringue buttercream tutorial and had two more epiphanies: 1) beat the egg whites until stiff peaks form; and 2) once the butter is added, stir on low speed with the paddle attachment. I had sort of figured this out for myself, but this was the first time I had actually read that SLOW SPEED was the important thing here (I don’t know if I just missed it in all the other tutorials I read, or what). The fourth time is apparently the charm, or maybe I was just used to it, because the frosting came together fine – but it still took over an hour of stirring!
If you’re still reading, you’re probably wondering why the heck I went to all this trouble to make this particular frosting. The answer is that is it freaking delicious – it tastes just like cheesecake without being sickly sweet. Nate watched me make this frosting four times and thought I was crazy because of how long it was taking, but then when he tasted it, he said, “Now I know why you persevered.” It’s that good. So here is the recipe, along with all my tips for making it.
Cream Cheese Swiss Meringue Buttercream (RECIPE FAILURE!!)
**DISCLAIMER: This frosting ended up being kind of disasterous to actually frost a cake with, so I don’t recommend it at all. Please see this post instead for a method that ACTUALLY works!**
Because this frosting is made with cream cheese as well as butter, the end result is a bit softer and heavier than regular, all-butter Swiss meringue buttercream. Knowing this ahead of time will save you some anxiety if you are expecting it to get super fluffy. Also, don’t make this if you’re on a time crunch – it just might take forever.
Adapted from KitchenSidecar – be sure to read this post for more tips on making this frosting.
Additional tutorials at Sweetopolita and From Scratch, SF, both recommended reading!
First, assemble your equipment:
KitchenAid strength mixer with bowl, whisk, and paddle attachment
balloon whisk
instant read thermometer (not strictly necessary)
Wipe down the mixer bowl, whisk attachment, balloon whisk, and thermometer with a paper towel moistened with white vinegar or lemon juice to remove all traces of oil – if there is any oily residue, the egg whites won’t whip up properly. Remove your butter and cream cheese from the fridge and cut it into cubes of about 1-2 tbsp each (1 cup = 16 tbsp, to give you an idea of the size).
1 3/4 cups unsalted butter
1 3/4 cups cream cheese
Leave them on the counter to come to room temperature (or just shy of) while you deal with the egg whites. In the mixer bowl (not attached to the mixer), whisk together:
7 egg whites
1 cup + 3 tbsp granulated sugar
Separate the egg whites, one by one, into a small bowl before adding them to the mixer bowl – this way if any egg yolk (ie, fat – see above!) gets into one egg white, you won’t have ruined all of the whites.

Place a small pot with about an inch of water on the stove over low heat. Place the mixer bowl with the egg whites in it on top of the pot to make a bain marie/double boiler. Make sure the water doesn’t touch the bottom of the bowl. Stir the egg whites constantly with the whisk – you’re not trying to incorporate air, just keep them moving so they don’t turn into scrambled eggs. Heat the egg whites until they reach at least 140˚F on the thermometer (between 140˚-160˚ is fine). If you don’t have a thermometer, rub a little bit of the mixture between your fingers – it should feel warm, almost hot, and perfectly smooth with no sugar granules left (the sugar will have dissolved completely). Remove the bowl from the pot and attach it to your mixer with the whisk attachment. Beat the whites on medium high until stiff peaks form.

At this point, the egg whites will probably still be warm, so turn down the speed to medium or low and keep beating until the egg whites are completely cool – this may take as long as 20 minutes. If you add the butter to warm egg whites, it will just melt.
When the egg whites are completely cool, turn the speed to medium and start adding your butter, cube by cube. Wait until each cube is mixed in before adding the next. Your meringue will fall, but this is supposed to happen – once all the butter and cream cheese are added, the frosting will fluff up again. (It’s a good idea to scrape the sides of the bowl with a spatula periodically from here on out.)

When you have added all the butter, add the cream cheese, once cube at a time.


When the cream cheese is mixed in completely, swap the whisk for the paddle attachment and stir on low speed – literally, the lowest speed on the mixer. I don’t know why, but the slow stirring helps the fat (butter/cream cheese) emulsify with the egg whites better. The frosting will look like a curdled mess, so from here on out, you need to have two things: patience and faith. I recommend setting a timer for 15 minutes and walking away from the frosting while it stirs – just go do something else, otherwise you will give yourself an ulcer obsessing about whether or not it is working. Check back after the 15 minutes are up, and set the timer again if needed (I had to do this at least four times).

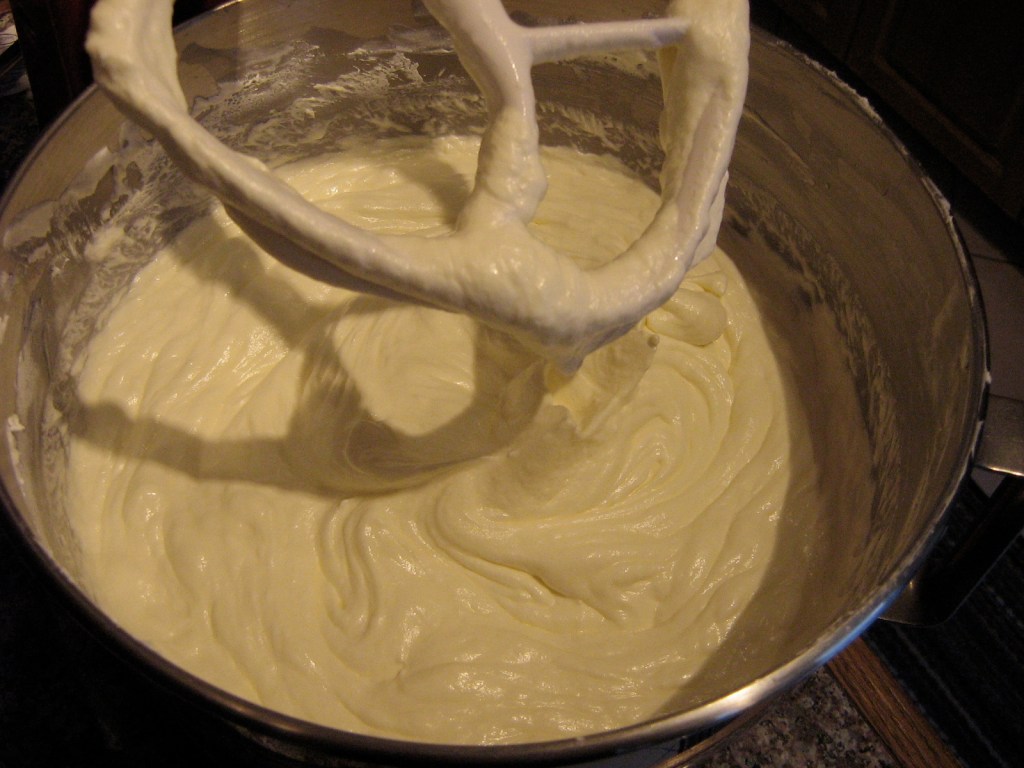
The frosting will go through varying stages of looking weirdly clumpy, watery, and slightly iridescent. Fear not. It will be OK. If the mixture starts looking too soupy, a 15 minute stint in the fridge to chill is a good idea. Just keep stirring on low, and eventually the frosting will start looking more and more homogeneous, more and more fluffy, until finally it looks like soft buttercream frosting.

This may take anywhere from 3 minutes (according to Martha Stewart) to over 2 hours (my experience). However long it takes, congratulations, you made it! Stir in:
a dash of salt
1 tsp vanilla (optional)
Use immediately (a stint in the fridge to thicken up might be a good idea first) or store in an airtight container in the fridge for up to one week. Can also be frozen – see the Sweetopolita tutorial for tips on refrigeration, freezing and thawing. Makes about 7 cups.


Leave a comment